measuring surface roughness – The Complete Guide to Methods & Standards
What is surface roughness – definition and meaning
Surface roughness describes the fine unevenness of a surface that is created by manufacturing processes. These microstructures consist of peaks and valleys that are often not visible to the naked eye. Technically, roughness is defined by the height profile of the surface and is measured using specific parameters such as Ra, Rz or Rt In order to evaluate these characteristics precisely, the Shows the surface roughness an indispensable step in quality control.
In addition, surface roughness directly influences the functionality of a component. It plays a decisive role in areas such as tightness, friction or the adhesion of coatings. For example, very low roughness is required for sealing surfaces, while for plain bearings a certain roughness is advantageous for optimal lubricating film formation.
Why is it important to measure surface roughness?
The precise measurement of surface roughness is an indispensable part of quality assurance. It ensures that components meet the required properties and work reliably in their intended function. For example, compliance with defined roughness values prevents problems such as excessive wear or leaks at an early stage.
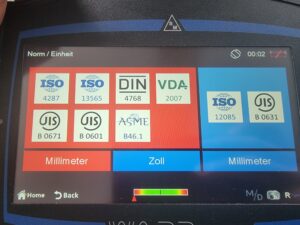
In addition, the measuring surface roughness in manufacturing to ensure compliance with international standards and norms such as ISO 4287 or DIN 12085 These standards enable a standardized evaluation of surfaces and thus create comparability between different production sites or suppliers.
Last but not least, measuring surface roughness reduces scrap and rework because problems are identified early. This saves costs and increases efficiency in production.
Measurement methods for measuring surface roughness
tactile measurement methods
Tactile measurement methods use a stylus device that scans the surface with a fine probe tip. This tip, usually made of diamond, records the height and depth profiles of the surface and converts them into electrical signals. These signals are then converted into measurement parameters such as Ra, Rz or Rt converted.
Stylus devices are particularly precise and enable a precise analysis of microstructures. Typical applications can be found in the automotive industry, tool manufacturers and in medical technology. However, this method requires direct contact with the surface, which makes it less suitable for sensitive or soft materials.
Optical measurement methods
Optical measurement methods offer a non-contact alternative to tactile roughness measurement. Technologies such as laser scanning and white light interferometry are used to analyze the surface structure using light.
- Laser scanning: A laser beam scans the surface and records the height differences through the reflection of the light. This method is particularly suitable for large and difficult-to-access surfaces.
- White light interferometry: This method uses interference patterns that arise when light hits the surface. It is particularly effective for analyzing extremely fine surface structures and delivers highly precise results in the nanometer range.
Optical methods are ideal for sensitive materials or applications where non-contact measurements are required. However, factors such as reflection properties or surface contamination can influence the measurement results.
Advantages and disadvantages of the measurement methods
Both measurement methods – tactile and optical – have their specific strengths and weaknesses, which should be taken into account depending on the application:
| tactile measurement methods | Optical measurement methods | |
| precision | Very high | Very high (up to the nm range) |
| Application | Ideal for hard and robust materials | Ideal for sensitive and soft materials |
| measuring speed | Comparatively slow | Faster, especially for large areas |
| surface contact | Necessary | Not required (contactless) |
| limitations | Not suitable for sensitive surfaces | Problems with highly reflective or dirty surfaces |
The choice of the appropriate method therefore depends strongly on the requirements of the application and the properties of the surface to be measured.
Important roughness parameters (Ra, Rz, Rt)
The precise analysis of surface roughness is carried out by determining various parameters, each of which characterizes different aspects of the surface. These parameters enable a detailed assessment of the surface quality and serve as a basis for quality assurance in production.
Ra (arithmetic mean roughness)
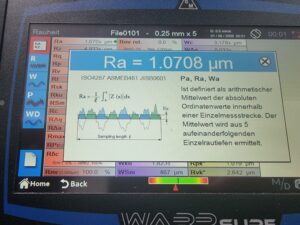
The parameter Ra is the arithmetic mean of all absolute deviations of the profile from the center line within the measuring section. It is one of the most commonly used roughness parameters because it allows a quick and easy assessment of surface roughness.
Application examples:
- Sealing surfaces: Here the roughness must be minimal to ensure good sealing.
- Machined surfaces: Ra is often used to evaluate the quality of milling, turning or grinding processes.
Rz (average roughness depth)
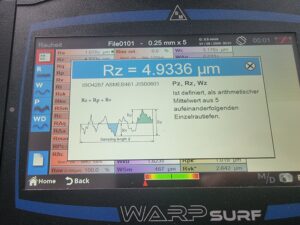
Rz indicates the average distance between the five highest peaks and the five deepest valleys of a surface. In contrast to Ra, this parameter provides more precise information about the peaks and valleys of the profile and is often used in technical surfaces.
Typical areas of application:
- Load-bearing surfaces: For applications where the contact area plays an important role, such as plain bearings.
- Coated components: Rz helps to evaluate the adhesion of coatings to rough surfaces.
Rt (total height of the profile)
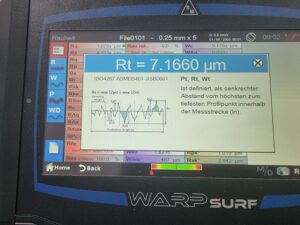
The parameter Rt describes the vertical distance between the highest peak and the deepest valley within the entire measurement section. Rt is particularly useful for determining the extreme height differences of a surface.
Meaning in practice:
- Mechanical loads: In aviation or mechanical engineering, it is important to know extreme height differences in order to avoid weak points.
- Seals: Rt indicates whether a surface is suitable for tight connections.
Other important parameters for measuring surface roughness
In addition to Ra, Rz and Rt, there are other parameters that provide specific information about the surface:
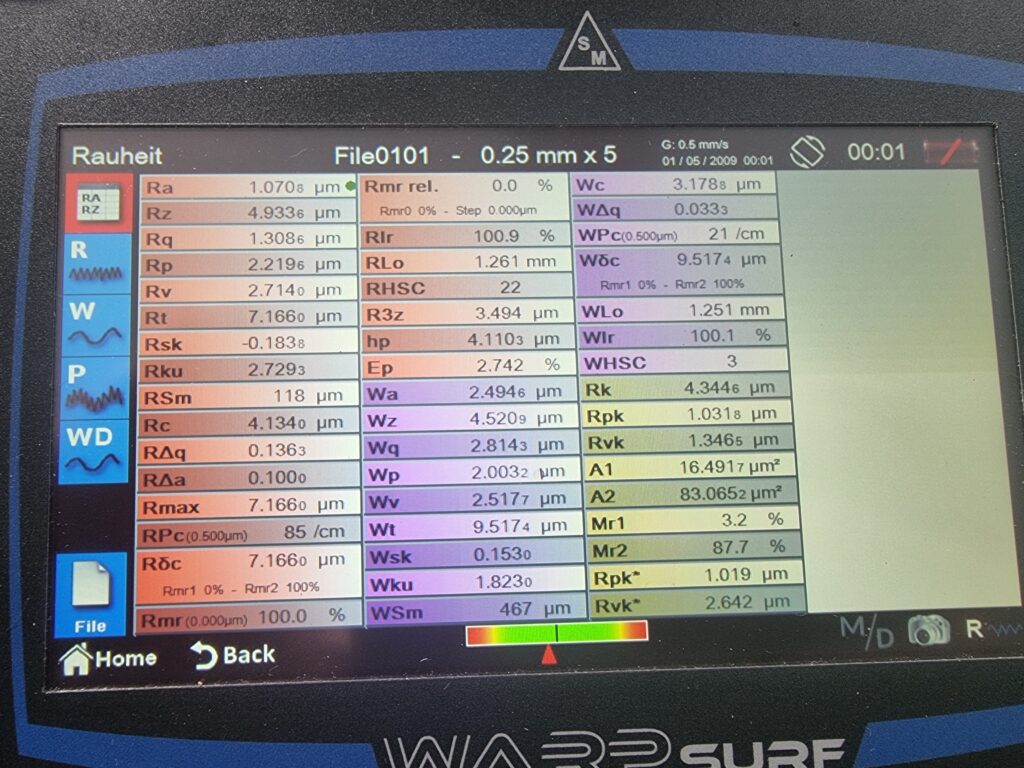
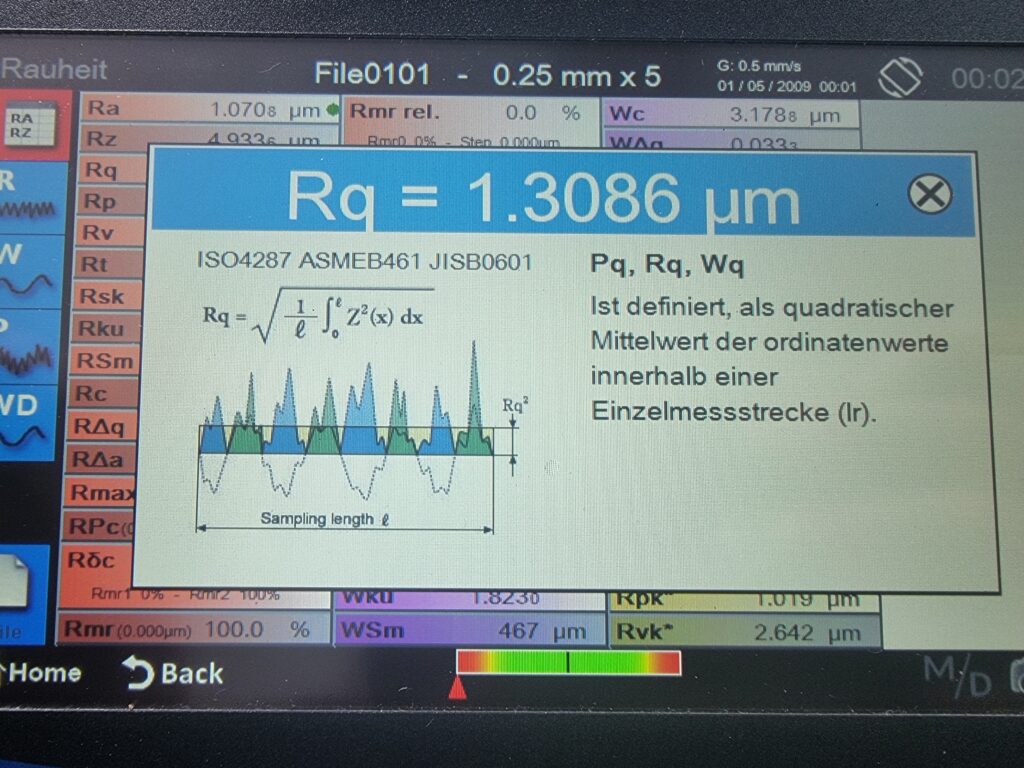
- Rq (root mean square of profile deviations): Similar to Ra, but more sensitive to larger deviations because they are quadratically weighted.
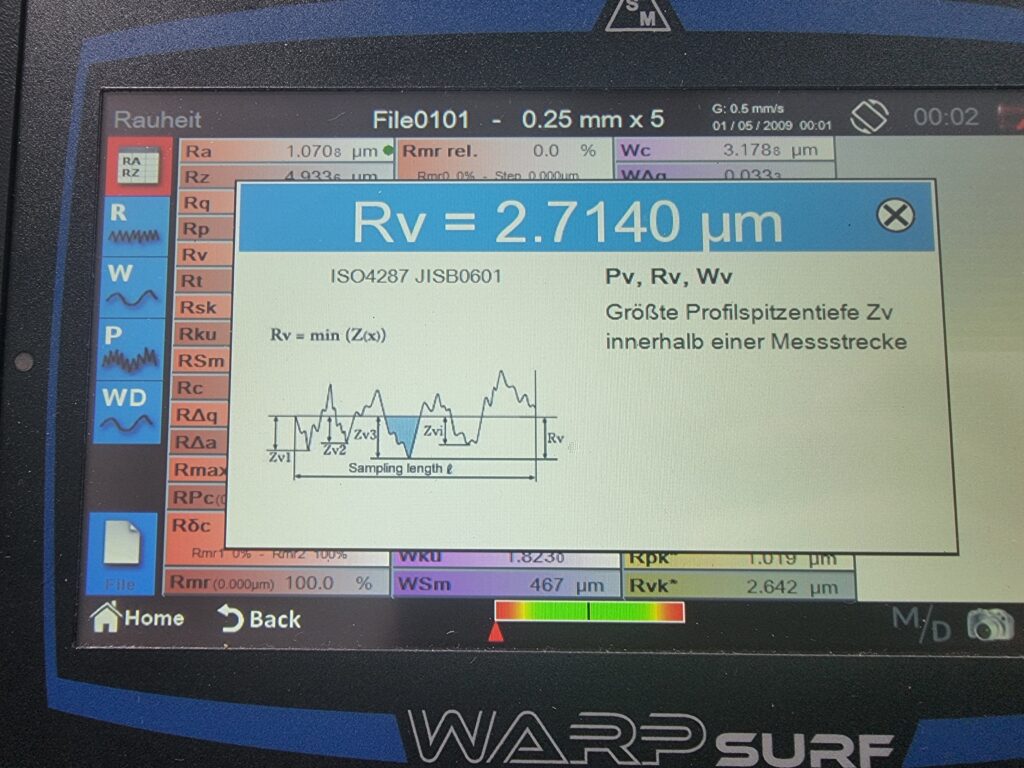
- Rmax (maximum profile height): Indicates the greatest distance between a peak and a valley within the entire measuring section and is particularly important for critical loads.
- Wq (root mean square of ripple): Characterizes the waviness of a surface and is mainly taken into account in optical or functional components.
Summary
The choice of the right roughness parameters depends strongly on the specific application and the functional requirements. The precise measuring surface roughness and the interpretation of the values make it possible to ensure the quality and durability of components.
norms and standards of roughness measurement
Precise and reliable measurement of surface roughness requires compliance with internationally recognized standards. These standards ensure a uniform definition and evaluation of roughness parameters, enabling comparability and traceability in production.
DIN EN ISO 4287: Definition of roughness parameters
The DIN EN ISO 4287 sets out the basic terms and definitions for the roughness measurement It describes how the most important parameters such as Ra, Rz and Rt be calculated mathematically.
Important contents of the standard:
- Determination of profile types: primary profile, roughness profile and waviness profile.
- Definition of key figures such as Rmr (material content) and Rp (profile tip height).
- Basis for the interpretation of measurement results in various industrial applications.
The DIN EN ISO 4287 is a central standard that forms the basis for many other standards and is recognized worldwide.
DIN EN ISO 4288: Guidelines for measurement and evaluation
The DIN EN ISO 4288 complements ISO 4287 by providing specific provisions for the implementation of roughness measurement It describes the selection of measurement parameters, the conditions for the measurement and the evaluation of the results.
Special features of the standard:
- Specifications for the selection of measurement conditions such as measuring distance and cut-off length.
- Criteria for the evaluation of measurement results and the classification of surface qualities.
- Application in production control to ensure that components meet the specified roughness requirements.
This standard ensures uniformity in measurement and evaluation, which is particularly important in global supply chains.
DIN EN ISO 21920: Current standard for surface texture
The DIN EN ISO 21920 is a newer standard that specifically targets the profile-based measurement and characterization of surfaces. It modernizes existing standards and also covers more complex requirements.
Main points of the standard:
- Extension of the profile parameters for a more precise analysis of surface structures.
- Adaptation to modern measurement technologies such as optical measuring systems.
- Definition of requirements for the documentation and traceability of measurement results.
This standard is particularly relevant for companies that use innovative manufacturing processes and whose products have complex surface structures.
Summary
Standards such as DIN EN ISO 4287, 4288 and 21920 ensure that the measuring surface roughness uniformly and precisely worldwide. They create the basis for quality assurance and promote the comparability of components across different industries.
Practical tips for precise roughness measurement
A precise measurement of surface roughness requires careful preparation and the right approach. The following tips will ensure that your measurement results are reliable and meaningful.
Preparation of the measurement object
The basis for exact results in measuring surface roughness is the correct preparation of the measuring object.
- Cleaning the surface: Remove any dirt, oil or particles from the surface. Even the smallest contamination can distort the measurement results. Use lint-free cloths or suitable cleaning agents.
- Positioning of the measuring object: Place the object stably and avoid movement during measurement. A firm fixation ensures that the probe tip or optical system can scan the surface evenly.
- Flatness of the surface: Make sure that the surface is flat to obtain correct measurement results.
selection of the appropriate measurement method
The choice of the right measuring method depends on the type of material, the surface structure and the desired parameters.
- Tactile measurement methods: This method is particularly suitable for hard and robust materials such as metals. Stylus devices offer high precision, but are less suitable for sensitive or soft surfaces.
- Optical measuring methods: For materials that are sensitive to touch or for large-area measurements, optical methods such as laser scanning or white light interferometry offer an ideal alternative. They enable rapid and contactless recording of roughness parameters.
- Combination of methods: In some cases it may be useful to combine both procedures to obtain more comprehensive results.
Choosing the right method is crucial to meet the requirements of precision and efficiency.
interpretation of the measurement results
The correct interpretation of the measurement results is the key to evaluating and optimizing the quality of the component.
- Understanding the parameters: Make sure you understand the meaning of the measured roughness parameters such as Ra, Rz and Rt exactly. For example, a high Rz value indicates a highly structured surface, while a low Ra value indicates a smooth surface.
- Comparison with standards: Check whether the measured values comply with the specified standards such as DIN EN ISO 4287 or meet the requirements of your customers.
- Consideration of the application: Always interpret the measurement results in the context of the intended function of the component. A surface suitable for seals requires different roughness values than a bearing surface.
Summary
A precise roughness measurement requires not only the right preparation and method selection, but also a clear understanding of the measurement results. By carefully implementing these steps, you ensure that your quality control meets the highest standards.
Common mistakes and challenges in roughness measurement
Measuring surface roughness is a precise process that is influenced by many factors. Errors can affect the accuracy of the results and lead to parts that do not meet the required quality standards. In this chapter, you will learn how to identify and overcome the most common challenges in order to measuring surface roughness to achieve reliable results.
Influence of environmental conditions on the measurement of surface roughness
The ambient conditions have a significant influence on the measurement accuracy.
- temperature fluctuations: Changes in room temperature can affect the meter and the component. Materials expand when warm and contract when cold, resulting in inaccurate measurement results. Make sure the measurement is taken in a controlled environment with a constant temperature.
- Vibrations: Vibrations from nearby machines or the workplace can interfere with the measurement. Place the meter on a stable surface, away from vibrating equipment.
- Dust and contaminants: Dust particles or dirt on the surface or the measuring device can also distort the results. Regular cleaning of the measuring device and the working environment is therefore essential.
Device-related inaccuracies in the roughness measurement
The performance of the measuring device plays a crucial role in the accuracy of the results.
- Calibration: A measuring device that is not correctly calibrated will provide unreliable data. Calibrate your device regularly according to international standards such as DIN EN ISO 17025to make sure it is working properly.
- Maintenance: Worn or damaged components, such as the probe tip of a tactile device, can significantly affect the measurement results. Check the measuring device regularly for wear and replace defective parts in a timely manner.
- Software updates: Keep the meter software up to date to ensure that all calculations and parameters are recorded correctly.
Incorrect interpretation of the data
Even with precise measuring instruments, errors can occur in the evaluation of the data if the operating personnel are not sufficiently trained.
- Training of employees: Make sure that all users understand the meaning of roughness parameters such as Ra, Rz or Rt and know how to interpret them. Only in this way can the measurement results be correctly evaluated and documented.
- Understanding the application: Incorrect interpretation of the measurement results can lead to surfaces with unsuitable roughness values being used. For example, a sealing surface requires different parameters than a sliding surface.
- Experience: Inexperienced users may overlook or misinterpret measurement results. Regular training and practical exercises help to minimize these errors.
Summary
Precise surface roughness measurement requires not only a high-quality measuring device, but also control of environmental factors, regular calibration and well-trained personnel. By identifying and eliminating these potential sources of error, you can ensure reliable measurement results and safeguard the quality of your components.
Future trends in the roughness measurement
development of new measurement methods
Measurement technology is in a constant state of change, and the future of roughness measurement promises numerous innovations. New technologies such as multisensor systems combine tactile and optical measurement methods to provide more comprehensive and accurate results. In addition, the use of Artificial Intelligence (AI) is becoming increasingly important in measurement technology. AI algorithms analyze large amounts of data in real time, detect deviations and enable a more precise assessment of surface roughness.
Another trend is the use of micro- and nanotechnologythat enable measurements at the molecular level. These methods are used in electronics, biotechnology and medical technology, where the highest precision is required.
integration into digital manufacturing processes
In the course of Industry 4.0, the roughness measurement increasingly integrated into digital manufacturing processes. Networked measurement systems communicate directly with machines and production lines to detect deviations in real time and correct them automatically.
In addition, cloud-based data analyticsto store measurement results centrally and make them accessible for different locations. This promotes collaboration in global supply chains and facilitates quality control across different production sites.
The combination of roughness measuring instruments with predictive maintenanceSystems offer companies the opportunity to monitor the condition of machines and tools and thus avoid unplanned downtime.
Summary of roughness measurement
The precise measurement of surface roughness is crucial for quality assurance in numerous industries. From the basics of roughness parameters to modern measurement methods and standards, we have examined the most important aspects of this technology. Looking to the future, new technologies and integration into digital processes open up completely new possibilities for measurement technology.
With the WARPsurf we offer a state-of-the-art roughness measuring device that meets both current requirements and is prepared for future developments. It combines precision, user-friendliness and flexibility in a compact design and supports international standards such as DIN EN ISO 4287 and DIN EN ISO 17025.
Do you have any questions about roughness measurement or to our WARPsurf? Our team of experts is at your disposal. Visit our product page or contact us directly – we will be happy to help you!
Adaptive Optics with Spatial Light Modulators
stylus method
stylus method – The basis of tactile…
measuring surface roughness
measuring surface roughness – The Complete Guide…
Laser Applications in Metrology
Laser Applications in Metrology 1. Introduction:…
